• Facebook
  • twitter
  • Feed RSS


kapan ni album release y?
hmmm,. menurut kabar tu y ni album genrenya lebih ke alternatif dan soft rock, coz bang M. Shadow dah kga bisa scream lg,. ckck, bkal kyk dear god gtu kali y,. tapi genre tetep metalcore or sebut aj genre crossover,.

Lagu yang agak dibocorkan adalah Unwind The Chainsaw, tapi pihak Warner Bros katany masih merahasiakany????
trus tu y yg byk beredar d youtube tu palsu abisss!!! hha
walopun katany- suara2ny agak mirip am M. Shadow, n' suara gitarny synister,.


M. Shadow dalam fansite nya mengatakan tidak ingin mengecewakan para fans mereka. N' berikut adalah kutipan dari yang dikatakan M. Shadow.

Hello everyone -
I realize that with the last record we stayed away from personally updating you guys with loads of information about how we were doing and about how the tours were going. We stayed away from doing too many interviews, radio and T.V. spots, trying not to overexpose ourselves. Not seeing ourselves everywhere and hearing about stupid shit we’ve said has generally made us happier people, much unlike the “City of Evil” record cycle. But I feel in doing so we have stopped communicating with the people that truly care about this band, the fans. So I’m gonna try to make these updates a little more frequently.
First I wanna say we had a great time touring this record. From the first tour in clubs, to headlining “Taste of Chaos”, to going out with Iron Maiden in Europe, to finishing it up with Buckcherry, Papa Roach, Burn Halo, Shinedown, Saving Abel and Rev Theory. We’ve made some great new friends and just had a great time playing to you guys every night. Rock on the Range and opening for Metallica in Mexico City were just added bonuses. We are gonna start rehearsing here in a couple days to get ready for Sonisphere over in the U.K and Ireland. We are looking forward to that.
We have been relaxing after almost 20 months of straight touring, but we have also been throwing around a lot of ideas for the new album. I think after we get back from the U.K. we will be able to fully get into this writing process. I’d hate to say more and start speculation and rumors this early in the process so thats all I’ll say about the album. Time flies and you’ll have a new record on your ipod before you know it, so be patient.
Since we’ve been home I’ve been working on a song with Slash for his solo album. It’s a killer track and he plays some of the most technical stuff I’ve ever heard from him.
But since it’s his record and not mine, more updates will have to come from him. “Waking the Fallen” went gold today and though we don’t talk about record sales much, this feels like a huge accomplishment. That record sold 3,000 copies the first week and is now well over 500,000 copies. In a day when music is virtually free, its a huge testament to the fans we have and the dedication they have given us for 10 years. Thanks guys and girls, we look forward to 10 more!
-Shadows

Daripada gatel2 bingung nyari albumny, dtunggu aj, orang emang blm keluar,. hha
mga aj ni album lbi bagus drpd album taon kmaren,. amin,.,


Tuesday, November 3, 2009

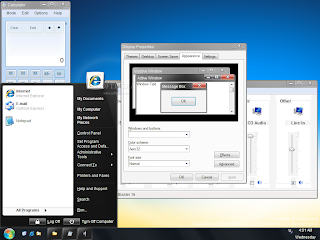
With this program you can use Windows 7 theme and programs like calculator, task manager, sound devices, notepad, wordpad and more ! click here to download 


Saturday, October 24, 2009

A free and useful program that lets you to explore, search and discover any location on earth


With Google Earth you can explore the earth from above! Want to know more about a specific location? Dive right in -- Google Earth combines satellite imagery, maps and the power of Google Search to put the world's geographic information at your fingertips.


Google Earth puts a planet's worth of imagery and other geographic information right on your desktop. View exotic locales like Maui and Paris as well as points of interest such as local restaurants, hospitals, schools, and more.


Here are some key features of "Google Earth":


· Navigation controls - Look around, move and zoom into any location
· Sun and shadows - View animated shadows as they move across the landscape
· 3D buildings - View hundreds of photo-realistic new buildings in many of the world's cities
· Imagery date information
· Support for new language versions
· Flash videos in placemark balloons
· Fly from space to your neighborhood. Type in an address and zoom right in.
· Search for schools, parks, restaurants, and hotels. Get driving directions.
· Tilt and rotate the view to see 3D terrain and buildings.
· Save and share your searches and favorites. Even add your own annotations.


Requirements:


· CPU: Pentium 3, 500Mhz
· System Memory (RAM): 128MB
· Hard Disk: 400MB free space
· Network Speed: 128 Kbits/sec
· Graphics Card: 3D-capable with 16MB of VRAM
· Screen: 1024x768, "16-bit High Color"


What's New in This Release: [ read full changelog ]


· Photo-realistic buildings from cities around the world
· Dawn to dusk views with the Sunlight feature
· Swoop navigation from outer space to street-level


Reasons why this program is marked as ad-supported:


· After installing Google Earth, the setup will ask if you also want to install  Google Toolbar (you can uncheck this option).


download here!


Wishy washy is a beautiful word
Why do I always wishy washy yeah!?
So lame yo, wanna repeated time and doing a very wanted to do
Mongrel!

Is there a chance ya allah!
I need chunks of debris opportunities
Stunned silence blank
Glaring and yelling
Kick and feel the pain

Too smart yo bos!
Feels like bruised heart
Too comfy to be swallowed in the esophagus
One more time Mongrel!
is a good B*tch, company me when feel like alone and nothing to spat with stinky smack drizzle
, hha.


Friday, October 23, 2009

With this guide, you would be able to add a background image or picture to your Blog, customize the position of your image, and have a static background image that stays in place when you scroll through the contents of your blog.

You will need to create an image. Find a picture you like. If you need a free photo editing tool, you can either search the net for one or use Google's Photo Editing Software Picasa. You can also use a small tile-size image which can be repeated so as to cover the entire page. Try not to have an image file that is too large as your page may take a little longer to load.

After creating a picture, you will need to upload it onto a free picture host. You can read about using free hosts like Google Page Creator and Google Groups. We have also a rather comprehensive list of free Image Hosts and File Hosting Services in our article on Manage Blogger Image Storage Space. Check out those sites and choose one that is fast, reliable and enables hotlinking to the uploaded files. Take note of the picture URL.

Next, log in to your dashboard layout; under Template -> Edit HTML, scroll to where you see this:-

body {
background:$bgcolor;


Change background color

If you would like to change the background color of your blog to a very unique color, you can manually specify the color value. Search online for color codes, or take a look at the HTML Color Chart to see if you can find your desired color. For example, if you have chosen a color code #B38481, change the above code to this:-

body {
background-color:#B38481;


If you are changing the background color of your sidebar only, add the color code under the relevant sidebar heading.

#sidebar-wrapper {
background-color:#B38481;


Similarly, if you want a different color for your main post column, add the color code as follows:-

#main-wrapper {
background-color:#B38481;


Note that different templates may label their stylesheets differently. The #sidebar-wrapper may be called #side-wrap or something to that effect.

In some templates like the TicTac Template, the background color you see is due to a background image and inserting a color code into the template will not help. To have a different color, this background image will have to be edited. For more details, read the article on Background Color of TicTac Template.

Add a background image

The code to insert is this:-

body {
background-image: url(URL address of your image);


Remember to insert the URL address of your image in the brackets. If you would like to have a feel of how a background picture will look like, I have uploaded a test image at this address � http://i154.photobucket.com/albums/s255/ownlblog/narutosasuke1024x768.jpg

Insert the URL of this test image into the above brackets and Preview your blog.

You can also have a background image just for your sidebar. Locate the style and add the background image code accordingly.

#sidebar-wrapper {
background-image: url(URL address of your image);


For a background image to your main post body only, add the code here:-

#main-wrapper {
background-image: url(URL address of your image);


Repeat background image

By default, the image is repeated to fill up the entire background of the page. If you have a small or tile-sized image, it will appear like a print pattern in the background. Sometimes, you may choose not to have the image repeated. If that is the case, you can insert this code:-

background-repeat: no-repeat;


Alternatively, you may only want the image to be repeated horizontally. The code is this:-

background-repeat: repeat-x;


To have the image repeated vertically, the code is this:-

background-repeat: repeat-y;


Position background image

If you have an image that is not repeated, you may like to specify the exact position of this image on your page. The HTML code to be inserted is this:-

background-position: top left;


Your image will appear at the top left corner of your page. The other possible values that you can use to replace �top left� are:-

top center;
top right;
center left;
center center;
center right;
bottom left;
bottom center;
bottom right;

If you do not want it entirely left, right or center, you can also define the horizontal and vertical alignments either in percentage or in pixels. Use either of these values instead, with x being the horizontal value and y being the vertical value.

x% y%;
xpx ypx;

Static background image

After that, you may specify whether you want your background image to remain in a fixed position when the contents of your blog are scrolled. By default, the picture scrolls with your content. To have it stay put, the code to insert is this:-

background-attachment: fixed;


Putting it all together

The eventual CSS code that you will have for your customized template may look like this:-

body {
background-color:#B38481;
background-image: url(http://i154.photobucket.com/albums/s255/ownlblog/narutosasuke1024x768.jpg);
background-repeat: no-repeat;
background-position: center center;
background-attachment: fixed;


You can also combine the attributes into one line and the shorthand code will look like this:-

body {
background:#B38481 url(http://i154.photobucket.com/albums/s255/ownlblog/narutosasuke1024x768.jpg) no-repeat center center fixed;


Of course, after having added the background image, you will need to adjust the colors of your text so that they stand out against the backdrop. Go to Template -> Fonts and Colors to do that.

This guide will give you an image background to your Blog. Sometimes, you may have several images, all of which are suitable for your Blog. You can read Random Header and Background Images on how you can have the background images rotated and a random image shown upon every page load.

You may also want to refer to the related article if you are thinking of adding an image to the Blogger Header.

© Tips for New Bloggers


Thursday, October 22, 2009

Until now, the Title Tags generated for each page of your Blogger blog would display the blog title first, then the name of your post. This wasn't so good for SEO (search engine optimization) as this made keywords from your post titles appear after your blog title.

So if you want to improve SEO that is important for your blog, follow step below.

1. Go to Layout > edit HTML in your Blogger dashboard.
2. Search for this tag:
<title><data:blog.pageTitle/></title>


3. Replace(means remove code above and place code below) this tag with the following:
<b:if cond='data:blog.pageType == &quot;index&quot;'>
<title><data:blog.title/></title>
<b:else/>
<title><data:blog.pageName/></title>
</b:if>
4. Save your template.

This work only in XML blogger templates. Also is and a hack for classic bloggers, but as I know noone use classic blogger anymore.


Below is a little trick that will stop your visitors from copying and pasting your blog information. Anyone with experience may know a way around this trick. However it will make it hard enough to discourage them and get them moving on to easier targets.

What to do?
Log in blogger / Dashboard --> Layout --> Add Gadget - scroll down --> HTML/JavaScript --> copy the next code and past in in HTML/JavaScript text box area

<script language="JavaScript">
<!--
//Disable right mouse click Script
//By Maximus (maximus@nsimail.com) w/ mods by DynamicDrive
//For full source code, visit http://www.dynamicdrive.com
var message="Function Disabled!";

///////////////////////////////////
function clickIE4(){
if (event.button==2){
alert(message);
return false;
}
}
function clickNS4(e){
if (document.layers||document.getElementById&&!document.all){
if (e.which==2||e.which==3){ alert(message); return false;
}
}
}
if (document.layers){
document.captureEvents(Event.MOUSEDOWN);
document.onmousedown=clickNS4;
}
else if (document.all&&!document.getElementById){
document.onmousedown=clickIE4;
}
document.oncontextmenu=new Function("alert(message);return false")
// -->
</script>


When someone will try to do right click a message will appear “Function disabled” , you can change this message too if you wish.


Wednesday, October 21, 2009

1. Create new blog. This is a test blog.

2. Upload your new template to test blog. Help

3. Go to Dashboard. Click to Layout of current blog (not new test blog) --> Edit HTML --> search for: <div id='sidebar'> copy all widget code between <div id='sidebar'> to </div>

5. Now Go again to Dashboard. Click Layout (at new test blog) --> edit HTML --> search for <div id='sidebar'> --> paste all widget code that you have copied. Put it between <div id='sidebar'> to </div> too.

6. Save

7. Download and save full template of test blog

8. Upload to your current blog layout, and you get new layout without deleting widget


Language:

 
;